Are you planning a printmaking lesson but feeling overwhelmed?
Do you want to introduce printmaking to young children but don’t know where to start?
If so, keep reading!
Printmaking is one of my favorite activities, and I include it in my curriculum every year. Some days, the lessons go smoothly, and both my students and I have a great time. But other days, we all feel overwhelmed 😂. When I reflect on why some lessons feel more challenging than others, I realize that while printmaking is an exciting and rewarding process art, its success depends on factors like approaches, student age group, and class size. These elements influence how students engage with the activity and ultimately affect their understanding and enjoyment of printmaking.
Rethinking Printmaking: A Dry Material!
When we think of printmaking, we often associate it with wet materials—printing ink by using brayers (rollers). However, I decided to try a completely dry approach by replacing ink with paint sticks!
What are paint sticks?
Paint sticks are a solid form of paint that comes in a crayon-like stick. (Paint sticks look just like glue sticks, so every time I bring them to class, at least one student mistakes them for glue.😅) They offer vibrant colors and smooth application.
Materials
To try this printmaking method, you’ll need:
- 4”x4” cardboard sheets
- Foam stickers (or EVA foam sheets, or traditional printing plates like Presto foam)
- Paint sticks
- Any type of paper
- Pencils
- Scissors
Step-by-Step Guide
1. Create an Image
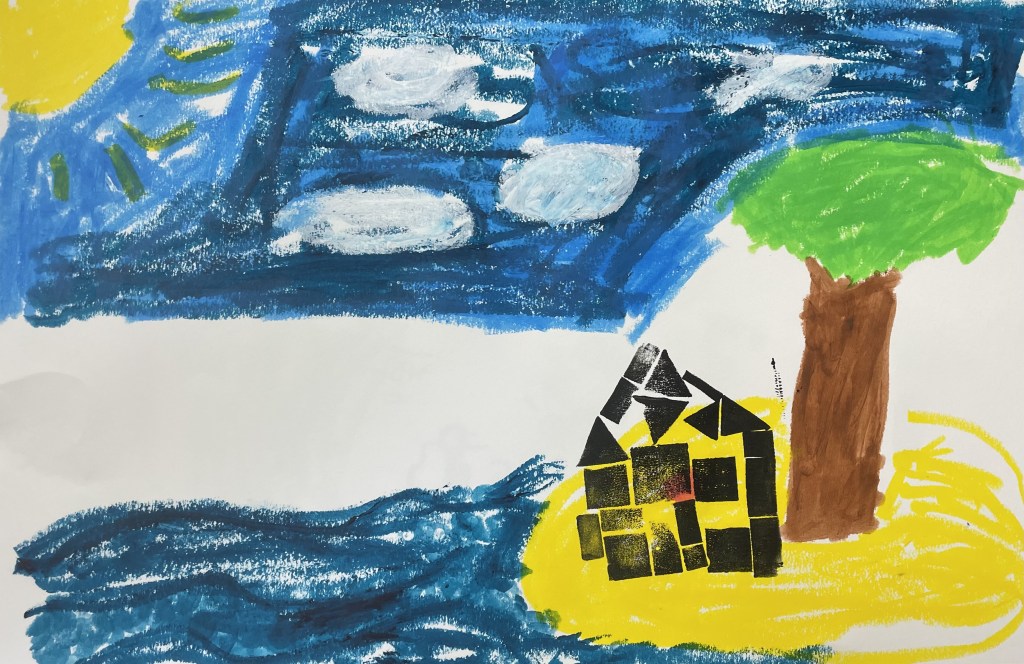
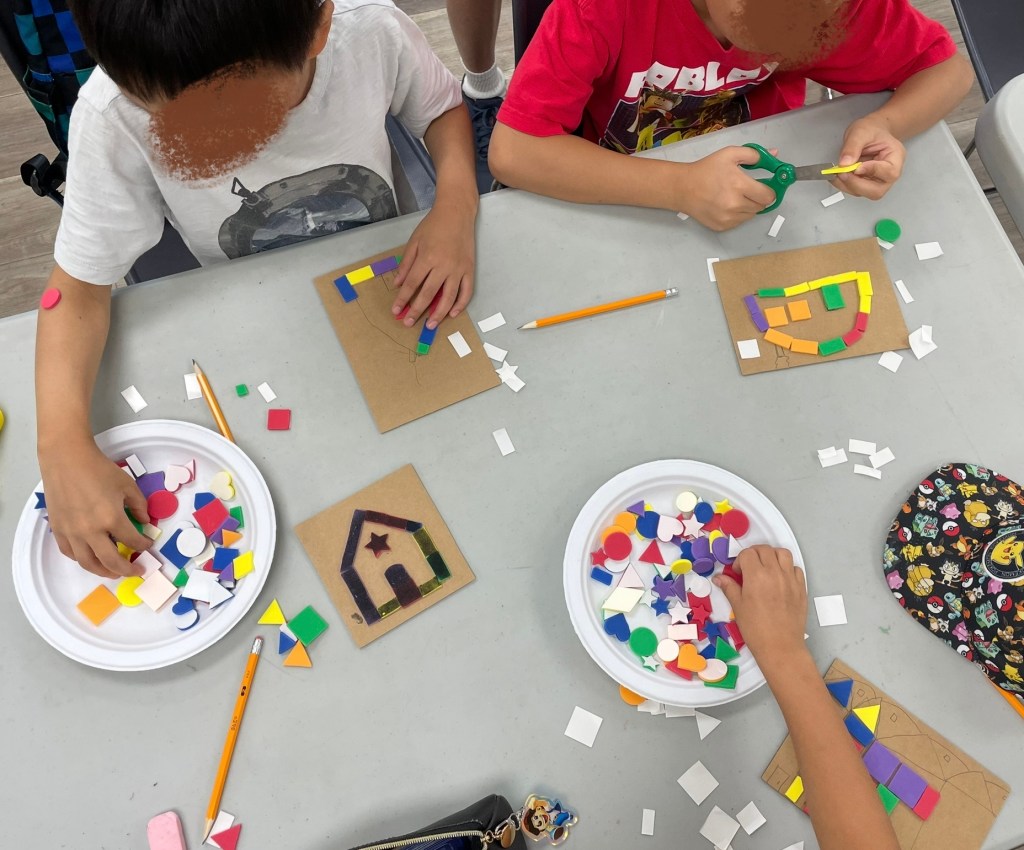
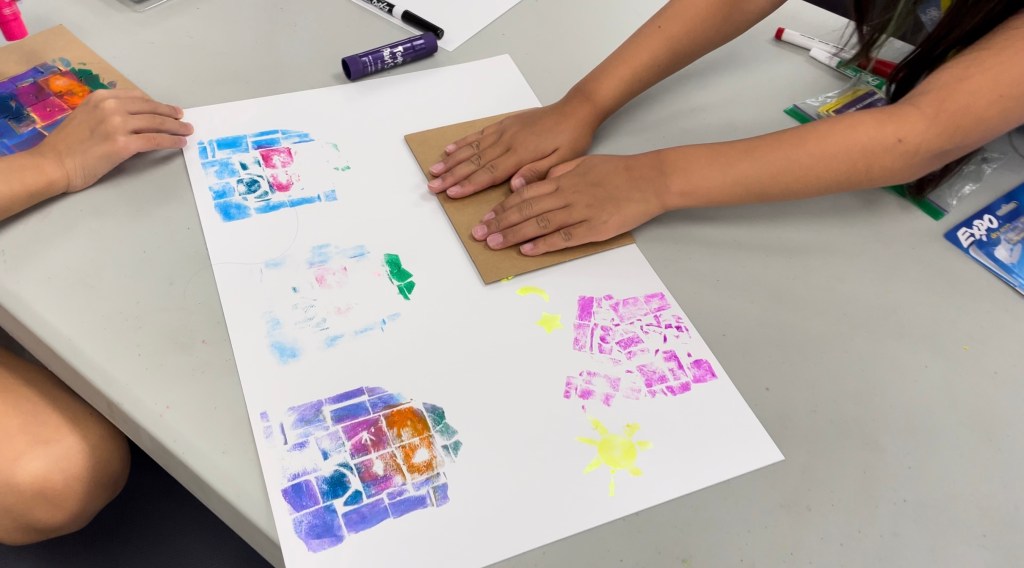
Start by having students draw their desired image onto the cardboard sheet. In the example shown in this lesson, students designed houses they would stay in while camping.
2. Build the Printing Plate
- If students want outline prints, they should place foam stickers along the drawn lines.
- If they prefer solid shapes, they can fill the drawn areas completely with foam stickers.
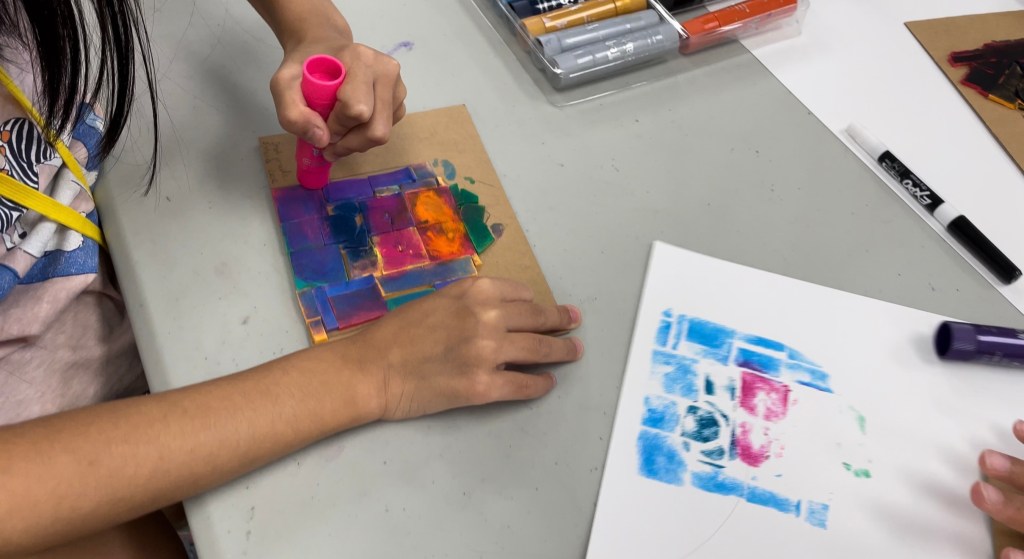
3. Apply Color with Paint Sticks
- Paint sticks dry faster than gel-like ink, so apply the color and print immediately for the best results.
- Cover the foam stickers completely with paint sticks, making sure the colors are evenly applied.
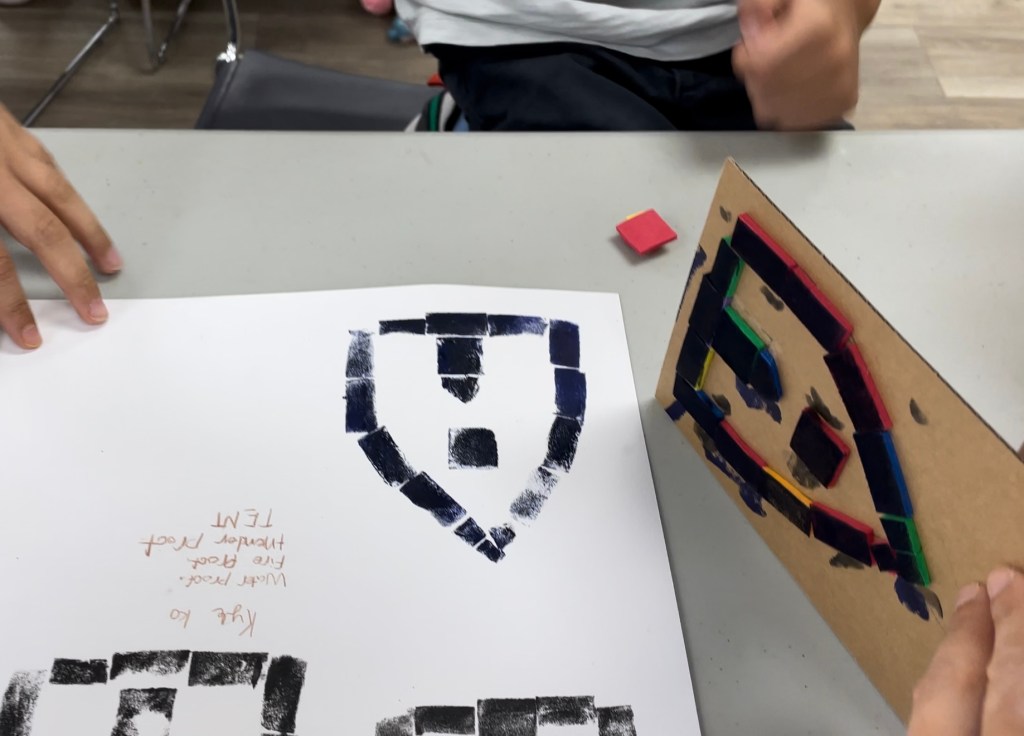
4. Print the Image
- Place the printing plate face-down onto the paper and press firmly, rubbing all areas to transfer the color.
- Then, carefully lift the plate to reveal the printed image!

Why Use Paint Sticks for Printmaking?
While paint sticks don’t create the exact same effect as traditional printmaking ink, they still produce a unique texture and allow students to experience printmaking in a more accessible way. Furthermore, one major advantage of using paint sticks is that they make color application easy and allow students to print multiple colors at once. If you’re looking for a simple, mess-free, and engaging printmaking activity for young children, this method is definitely worth trying!
P.S. The links to the materials are for products I personally use and recommend, but there are many other brands available. Feel free to explore and find the materials that work best for you!
#printmaking #printmaking idea#artprogram #artlessonplan
By TAE


Leave a comment